

Build a PVC Cucumber Trellis: DIY Plans and Cut List

For most home gardens, a furniture-grade PVC A-frame trellis is the right build. It stands on its own, plants climb both sides, and it handles wind better than a flat panel. For standard slicing cucumbers, aim for a suitable tall structure; long European or Armenian varieties need a taller one. Drive your base stakes or rebar sufficiently deep into the ground. Circo Innovations furniture-grade fittings are the recommended source for connectors and snap clamps for this build.
Table of Contents
How to build a 6 ft x 4 ft A-frame: step-by-step with cut list
How do you make a PVC trellis strong enough for heavy fruit and wind?
How do you train cucumbers to climb and fruit well on a trellis?
How do you fix sagging, loose joints, and other common trellis problems?
Why use furniture-grade PVC fittings, and when should you choose something else?
What materials do you need for a PVC cucumber trellis?
For an A-frame trellis sized appropriately to your garden, here is an example parts count:
Component | Spec | Qty |
Vertical legs | 1" Sch 40 PVC, appropriately cut length - 6 ft. works great. | 4 |
Top apex rail | 1" PVC, cut to fit your trellis apex length. 4-5' wide works well | 1 |
Base rails | 1" PVC, cut to fit base width | 2 |
Crossbars (mid-height) | 1" PVC, sized to suit cross section | 2 |
3-way elbow connectors | Furniture-grade fittings suited to your build - UV PROTECTED | quantity as needed |
Tee connectors | Furniture-grade fittings suited to your build | quantity as needed |
1" - needed for shade cloth in certain areas and netting for tendrils | 10 | |
End caps | size compatible with your pipe | quantity as required |
UV-resistant nylon netting sized to cover your trellis surface with a mesh size suitable for cucumber tendrils. | ||
Ground stakes or rebar long enough to anchor your trellis securely | quantity as needed |
Tools: pipe cutter or miter saw, drill with bits, rubber mallet, tape measure, marker, level, safety glasses.
Shopping tips: Search “furniture grade PVC fittings” to find the right connectors. Favor UV-stabilized pipe in full-sun sites. Schedule 40 is the standard balance of strength and cost; step up to Sch 80 only for very exposed or heavy-load builds.
How do you match trellis size to your cucumber variety?
Beginners often build too short. A vine that runs out of trellis piles up at the top, tangles, and stops producing well. Match height to variety before you cut a single pipe.
Cucumber Type | Examples | Minimum Trellis Height |
Pickling | Sumter, National Pickling | 4–5 ft |
Slicing | Marketmore, Straight Eight | 5–6 ft |
Long European/Armenian | Diva, Armenian | 6–7+ ft |
Bush types | Spacemaster, Salad Bush | No trellis needed |
Quick decision flow: small balcony or raised bed under 4 ft? Go flat panel. Open bed with wind exposure? Build the A-frame and add diagonal bracing. Growing long European varieties? Add a full extra foot of height and use 1" pipe minimum. Want to plant on both sides and harvest without bending? The A-frame wins on every count, which is why it is the recommended method for most home gardeners.
Which PVC trellis design fits your space and skill level?
Three builds cover almost every situation. Pick the one that matches your footprint and how much time you want to spend on a Saturday.
Flat netting panel fits a single row along a fence or raised bed edge. Minimal parts, lowest cost, and you can have it up in under 30 minutes. The tradeoff: it needs an existing fence or two well-anchored posts, and you only plant one side.
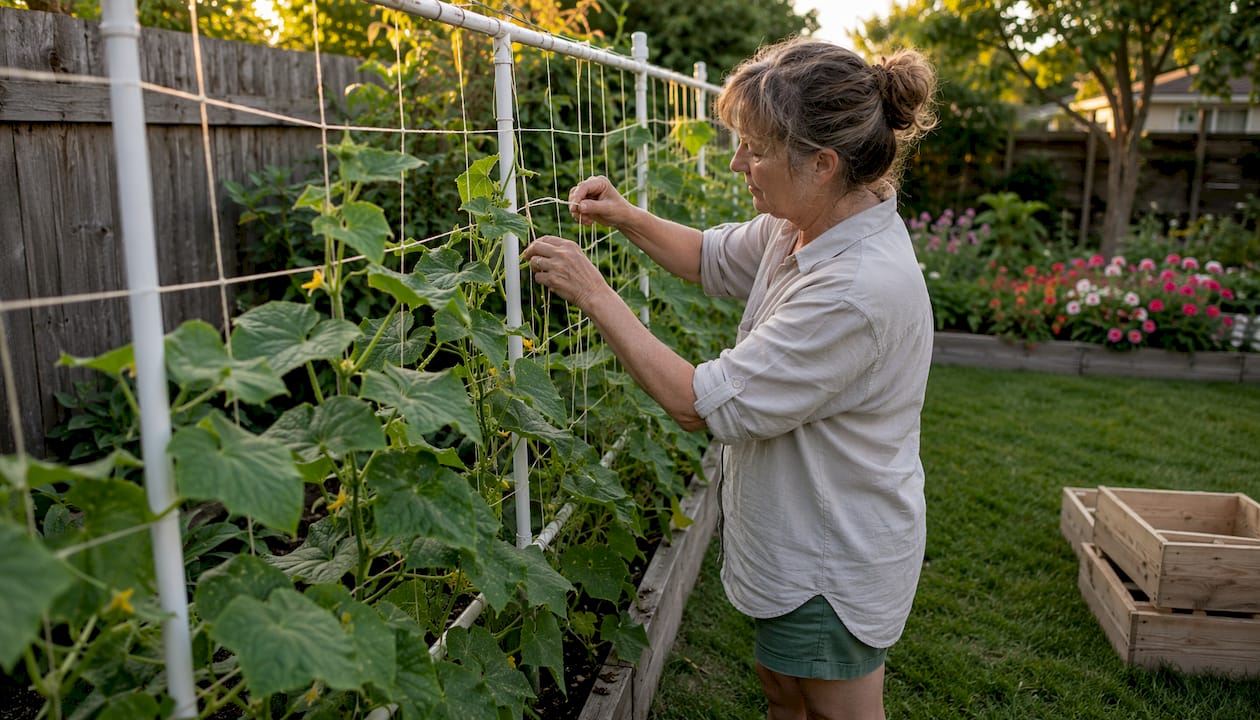
A-frame is the general-purpose pick. Two panels lean together at the apex, plants climb both sides, and the triangular shape resists wind without any guy wires. It costs a bit more in fittings but pays back in planting density and stability. A-frame designs give double-sided planting with better wind resistance than flat panels.
Arch (half-circular or PVC arch) suits long rows and walk-through harvesting. Cucumbers climb up both sides and hang fruit inside the arch for easy picking. It requires more fittings or larger-diameter pipe and takes the most time to assemble. Circo innovations specialized fittings are well suited to arch builds where standard elbows fall short.
How to build a 6 ft x 4 ft A-frame: step-by-step with cut list
Cut list (1" Sch 40 PVC):
4 vertical legs at 72"
2 base rails at 48"
1 apex rail at 48"
2 mid-height crossbars at 48"
Assembly steps:
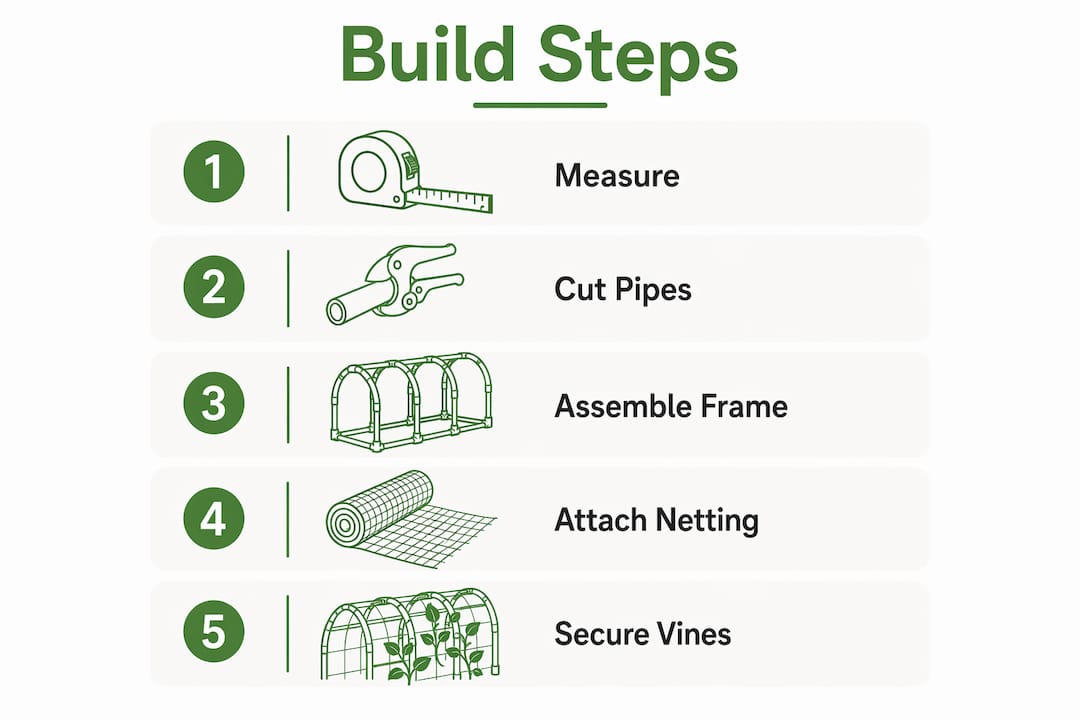
Cut all pipe to the lengths above. Deburr cut ends with sandpaper or a utility knife.
Lay two vertical legs parallel on the ground, 48" apart. Connect the base rail between them using tee connectors at each end. Repeat for the second panel.
Attach mid-height crossbars to each panel using snap clamps at the 36" mark on each vertical.
Stand both panels upright and lean them together at the top. Connect the apex rail using 3-way elbow connectors at each peak. Check that the base spread is roughly 24"–30" per side for stability.
Drive rebar or ground stakes through the base rail tee connectors into the soil at least 12–18 in. deep. In sandy or very windy soil, increase embedment to 18–24 in. or use concrete footings.
Stretch UV-resistant nylon netting over both panel faces. Secure with snap clamps every 12". Pull the netting taut before fastening — loose netting sags under fruit load by midsummer.
Add end caps to all open pipe ends to block insects and moisture.
Check the structure with a level and adjust base spread until it stands plumb.
Time estimate: 2–3 hours for a first build. Cost estimate: $40–$70 in materials depending on pipe length and netting quality.
Pro Tip: Fully seat every joint with a rubber mallet before adding screws. At high-load fittings (the apex and base tees, cause cucumbers get surprisingly heavy), drive a single self-tapping screw through the fitting into the pipe to prevent rotation under a heavy fruit load. Snap clamps handle the netting attachment without any glue.
How do you make a PVC trellis strong enough for heavy fruit and wind?
Pipe diameter is the first decision, and understanding plastic grades and parts used in agricultural equipment can help you select the best materials for longevity and strength (more details). For most home trellises, 1" furniture-grade PVC handles a full cucumber harvest without flexing. Step up to 1-1/4" or Sch 80 in very exposed sites or for builds taller than 7 ft.
Load note: Cattle-panel or welded-wire alternatives carry far greater loads than PVC frames. For heavy commercial production, metal panels are the more durable option. For home gardens, properly reinforced PVC (using 1" Sch 40 as the standard, and considering Sch 80 for very heavy or exposed builds) is perfect.
Reinforcement options ranked by effort:
Rebar through base rails: the single most effective anchor; costs almost nothing.
Diagonal bracing: add a 45° brace from mid-vertical to the base rail using a tee and a short pipe section.
Stainless screws at apex and base fittings: prevents joint rotation under load.
Guy wires: useful for tall builds (7 ft+) in open, windy sites.
Concrete footings: reserve for permanent installations or very loose soil.
Do not rely on PVC cement alone for high-load joints on a trellis. Cement bonds pipe to fitting permanently but does not add shear strength at the apex where lateral wind force concentrates. Mechanical fasteners and proper anchoring do the real work.
How do you train cucumbers to climb and fruit well on a trellis?
Get vines onto the trellis early. Once a stem sits on the soil for more than a week or two, it stiffens and redirecting it risks snapping at the node.
Spacing: plant 12–18 in. apart along the trellis base for slicing types; 12 in. for pickling types.
Weeks 1–2: when plants reach 8–12 in. tall, gently guide the main stem toward the trellis and tie loosely at a node with soft garden twine or fabric ties.
Weeks 3–5: add vertical twine runs every 6–12 in. up the netting so vines have a contact point within reach as they grow. Vertical supports spaced every 6–12 in. keep vines from tangling and let fruit hang freely.
Week 5+: tendrils take over. Your job shifts to keeping the main stem heading upward.
Pruning: remove lateral suckers below 24 in. to improve airflow and reduce disease pressure.
Harvest: pick slicing cucumbers at 6–8 in. and pickling types at 2–4 in. Harvesting every 1–2 days at peak season keeps the plant producing new flowers.
Irrigation: use drip or soaker hose at the base. Overhead watering wets foliage and defeats the disease-prevention benefit of trellising.
How do you fix sagging, loose joints, and other common trellis problems?
Sagging crossbars: the netting was not pulled tight at installation, or the pipe is undersized. Re-tension from the top corners and add a snap clamp at each sag point. If the pipe itself bends, replace with 1" or step up to 1.5".
Loose joints: add a stainless-steel pilot screw through the fitting. Snap clamps at netting attachment points can be repositioned without tools, which makes seasonal adjustments fast.
Vines slipping: add more vertical twine runs. Gaps wider than 6–8 in. give tendrils nothing to grab, so a heavy section breaks free under fruit load.
UV craze on pipe: surface crazing is cosmetic on UV-stabilized pipe but signals degradation on standard PVC. Replace affected sections before the next season.
Pro Tip: At the end of the season, disassemble the trellis and store pipe and fittings indoors or in a shed. Furniture-grade PVC lasts many seasons when kept out of winter UV exposure. Snap clamps make disassembly a five-minute job.
Seasonal checklist: inspect all joints after the first heavy storm, replace degraded zip ties with stainless clamps, and check netting tension before vines reach full load in midsummer.
Why use furniture-grade PVC fittings, and when should you choose something else?
Furniture-grade PVC fittings are modular, rot-proof, and sized to fit standard pipe without glue. You can reconfigure the same fittings into a greenhouse, a cold frame, or a pet enclosure after cucumber season ends. Circoinnovations fittings are designed for exactly this kind of multi-project reuse, which makes the upfront cost easy to justify.
The realistic limits: long-term UV exposure degrades non-UV-stabilized pipe over several seasons. PVC also carries less load than galvanized cattle panels, which can handle 50+ kg and last 20 years without maintenance. For a permanent farm installation or a very high-yield commercial row, metal infrastructure makes more sense. For a home garden, a raised bed, or a balcony, modular PVC is lighter, cheaper, and far easier to modify mid-season.
Key Takeaways
A furniture-grade PVC A-frame trellis, built to 5–6 ft for slicing cucumbers and anchored 12–18 in. deep, is the most practical and reusable DIY cucumber support for most home gardens.
Point | Details |
Recommended build | A-frame with 1" Sch 40 furniture-grade PVC; suits most slicing and pickling varieties. |
Height and anchoring | 5–6 ft for slicers, 6–7+ ft for long types; drive stakes or rebar 12–18 in. deep for standard soil; in sandy or very windy soil, increase embedment to 18–24 in. or use concrete footings for tall builds. |
Key reinforcement tip | Add a single stainless-steel pilot screw at apex and base fittings to prevent joint rotation under load. |
Training cue | Guide vines at 8–12 in. tall; add vertical twine every 6–12 in. for tangle-free climbing. |
Circoinnovations fittings | Get the 3-way elbow connectors, snap clamps, and project plans at Circoinnovations for a printable cut list. |
The case for building it right the first time
Most gardeners who struggle with cucumber trellises built something too short, too light, or too temporary. A 4 ft tomato cage for a Marketmore vine is not a trellis; it is a delay. The vine outgrows it by July, tangles, and the fruit quality drops.
The A-frame design prioritized in this guide is not complicated, but it does require committing to the right pipe diameter and anchoring it properly. The payoff is a structure you can disassemble in October, store flat, and reassemble next May in under an hour. Modular furniture-grade fittings make that possible in a way that glued or nailed builds simply do not.
One thing worth testing before you scale up: build a single 4 ft section first. Check that your soil holds the stakes, that the apex connector seats cleanly, and that the netting tension feels right. Then extend to full length. That 20-minute trial run prevents the frustration of rebuilding a full 8 ft structure because one joint was off.
Get the right Circoinnovations fittings for your build
The cut list in this guide maps directly to Circoinnovations furniture-grade components. The 3-way elbow fitting handles the apex and base corners of the A-frame. Snap clamps attach netting and crossbars without glue, so you can adjust or disassemble at the end of the season without cutting anything. The full Circo fittings catalog covers tee connectors, end caps, and specialized connectors for arch builds.
Circoinnovations ships across the United States. Browse the online store to order exactly what the cut list calls for, or download a printable version of the plan from the plans page before you head to the hardware store.
Useful sources and further reading
Circoinnovations plans page — downloadable cut lists and project templates
Circoinnovations PVC ideas blog — additional project inspiration
Blooming Expert: 5 Cucumber Trellis Methods — method comparisons, spacing, and pros/cons
Blooming Expert: Train Cucumbers Up a Trellis — training timeline, spacing, and irrigation guidance
CityRooted: Growing Cucumbers Vertically — load comparisons and material tradeoffs
Raise Your Garden: DIY PVC Trellis — cut list method and netting spacing
GardenerBible: How to Build a PVC Cucumber Trellis — pipe schedule guidance
Recommended


Comments